2 Methods to Password Protect Image Files
Create a Password Protected Archive File With the Image in it
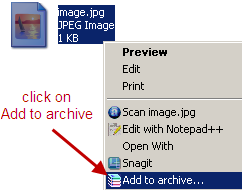
This is an obvious solution. Just compress the image file and password protect the archive file. You can easily do this with Winrar. Assuming that you have already installed Winrar, you can follow the steps below to create a password protected image file.1. First right click on the image file and click on Add to archive.

2. Click on the Advanced tab in the Winrar window. Then click on the Set Password button. Enter the password and click ok.

Then press ok again to create the archive file. That’s it. The resulting archive file will be protected with the password you provided in the second step above.
Use Lock Image to Create Password Protected Exe File From Image
Lock Image is an open source tool that converts and image into exe file. The exe file contains the image file which can be seen by entering the correct password. This tool is portable which means that you don’t have to install it and you can carry it in your pen drive with you. Here’s the procedure to create password protected image files using Lock Image,1. Download Lock Image (the LockImage-0.1-bin.zip file) from this page. Extract the zip file and simply double click on it to launch Lock Image.
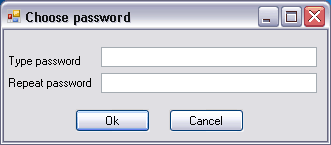
2. To password protect any image, just drag it into the application’s window. Then go to File > Save, enter the file name and click on the Save button. At this point the password window will appear,

Enter the appropriate password and press ok. That’s it. The program will generate an executable file which will ask for password to show the embedded image.


0 comments:
Post a Comment